Friday, June 20, 2014

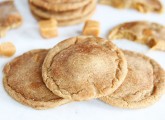
Unicorn Poop Cookies!

Have you got a little girl in your life that would looooooove to eat a unicorn poop cookie? I do, so I won't be showing her until I have the time to make them... They look amaaaazing!


Ingredients

Main Ingredients

  • 1 cup(s) Sugar $
  • 1/2 cup(s) Butter - Softened
  • 1/2 cup(s) Shortening
  • 3 1/2 tablespoon(s) Cream Cheese - Softened
  • 1/2 teaspoon(s) Salt $
  • 1 whole(s) Egg
  • 1/2 teaspoon(s) Almond Extract
  • 2 cup(s) All Purpose Flour
  • Food Coloring (As many different colors as you want the cookies to be!)
  • Decorations
  • Silver Candy Balls (If Desired)
  • Food Sprinkles (If Desired)
  • Sparkle Gel
  • Edible Glitter

Preparation

Prep Time: 
Cook Time: 
Cooling: 45 Minutes 
Tinting The Dough: 30 Minutes 

  1. ------------
  2. Cookies
  3. ------------
  4. 1. Combine butter, shortening and cream cheese in a large bowl, beat together until smooth. Add sugar and salt. Beat until combined. Beat in egg and almond extract until combined and gradually add the flour beating until combined.

  5. 2. Form dough into a ball with your hands and then into a log shape, divide the log shape into six portions (or how ever many colors you want).

  6. 3. Place each portion of dough into individual wraps of plastic and tint the dough different colors (See Below for instructions on how to tint the dough)

  7. 4. Chill tinted dough in the refrigerator 1 hour or freezer 15-20 minutes.

  8. 5. Divide each tinted chilled dough ball into 8 equal pieces.

  9. 6. Take one piece of each colored dough (leaving the rest in the fridge while you work) and roll out like a rope or snake on your counter-top. If you use a piece of waxed paper on the counter, you shouldn't have to add any flour.

  10. 7. Roll the rope shape to about 6 inches long. Continue rolling all the colors and stacking them into a pile. Gently press the ropes together and roll the large multicolored "rope" on the counter to round and smooth it and if desired to lengthen it to 10 to 12".

  11. 8. Cut the multicolored "rope" into two pieces, using both hands, roll with your palms in different directions on both end of the rope pieces to twist it gently.

  12. 9. Coil the rope into a poop shape, using your imagination as to what you think unicorn poop should look like

  13. 10. Press in some silver candy balls (dragee) into the dough pieces to decorate if desired. Place dough on greased cookie sheet (or one covered with parchment or silicone mat) and bake at 375 F for 8-10 minutes until cookies are set and bottoms are light brown, they will not spread very much.

  14. 11. Cool on wire rack.

  15. 12. Coat with sparkle gel and/or edible glitter to give them some sparkle and add some sprinkles to the still wet gel for more texture. Let cookies dry completely before stacking.

  16. -----------------------------
  17. Dough Coloring Tint
  18. -----------------------------
  19. Do this prior to chilling the dough, so that you don't undo the chilling process with your body heat.

  20. 1. Get a large piece of plastic wrap (to protect your hands and table from the dye), place a ball of cookie dough in the middle.

  21. 2. Poke a well in the center with your thumb.

  22. 3. Add the food coloring to the well and then fold the dough over the coloring.

  23. 4. Wrap it in the plastic wrap, and begin kneading the food coloring into your dough.

  24. This may take a while and you may find that you need more food coloring (Hint: Colored Cookie Dough bakes lighter than what you see when you first tint the dough, once you've gotten the right color tint, add more).


Tuesday, June 17, 2014

Flourless Peanut Butter Oatmeal Chocolate Chip Cookies

I'm not a fan of peanut butter but my family is... So finding a recipe for a  delicious looking cookie that is easy to make lactose free (husbands allergies), is a dream!

And I found it here 
They have some amazing recipes over there!
I used vegan dark chocolate to make it lactose free, it's a really easy recipe!!!

Description

Thick, chewy peanut butter oatmeal chocolate chip cookies made without butter or flour. Delicious!

Ingredients

  • ⅔ cups Rolled Oats (gluten-free If Desired)
  • 1 teaspoon Baking Soda
  • 1 cup Old-fashioned Peanut Butter (I Used Skippy Creamy)
  • ⅔ cups Dark Brown Sugar
  • 2  Large Eggs
  • 1-½ teaspoon Vanilla Extract
  • ⅔ cups Chocolate Chips

Preparation

Preheat oven to 350ºF.

In small bowl, mix together the oats and baking soda; set aside.

In a large bowl, beat peanut butter, brown sugar, eggs and vanilla with an electric mixer until smooth, about 3 minutes. Mix in dry ingredients with a wooden spoon, then gently fold in chocolate chips.

Roll cookies into 2-inch dough balls and place onto cookie sheet 2 inches apart, then barely flatten the top of the cookie with your hand. The dough should be pretty sticky so if you find this method annoying, simply use a cookie scoop to drop the cookie dough onto the prepared baking sheet. The cookies may not be as round in shape and perhaps a bit thicker, but that’s okay, they will still be delicious.

Bake cookies for 9-11 minutes and remove when edges barely begin to turn a golden brown. The cookies may look a little underdone, but they will continue to cook once you remove them from the oven. Cool for 2 minutes on the cookie sheet then transfer to a wire rack to cool completely. Repeat with remaining cookie dough.

Makes 16-20 cookies.

Notes:
1. You can use less sugar or less chocolate chips to save calories—I have tried using 1/2 cup of sugar and 1/2 cup mini chocolate chips and they turned out great!
2. Feel free to substitute almond butter or another nut butter in replace of peanut butter.
3. These cookies disappear quickly so I recommend doubling the recipe!


Tuesday, May 20, 2014

Mothers Day Classic 2014

Mothers Day Classic

We do this every year…  The Mothers Day Classic is a walk/run to raise funds and awareness for a cure for breast cancer… Marley has been a few times, Mace has even been once, but this year I took Marley along to do the walk with us, as an equal (as equal as a 5yo can get) and she did very well…  When she needed a rest she got a piggy back…  It was a good start on explaining about fund raising and participating in the community, we touched on cancer too…  She had a fabulous day, we all did!  I can’t wait to take her with me again next year!


Monday, May 19, 2014

Zingo, kids bingo!

One of my girlfriends bought my kids zingo, and it is awesome... I was blessed that she bought the picture version AND the sight word version, so both kids really get something out of it... We can play this for aaaages, and because it's bingo, it's an even playing field for both kids... I highly recommend this for pure educational joy!!

Tuesday, May 13, 2014

Utopia the film...

I must admit that this has been sitting on my ipad since just after I watched Black Fish, I was so traumatized by that, I needed to wait until I was normal again to watch Utopia…  I think that it is important that all Australians know about some of the atrocities committed against our first Australians, past and present…


I couldn’t watch it in one sitting…  The first time I stopped it was at 2.18, I just didn’t know if I could go on…  I know white Australia has continually messed up, been monsters and committed the worst crimes against our first people, but seeing it just made my general state of white shame and guilt rise to the surface…  I struggle with these things, how can we all live these great lives while our first Australians continue to die before us from treatable and preventable medical issues, that our first people live in the worst conditions and greatest poverty, fearing for their childrens wellbeing when DHS comes around looking to take their children into care, rather then hooking up more services to help these impoverished families…  Aaaaagh…


Eventually I got through it…  I hope that all Australians find themselves watching this at some point in their lives…  I hope that the government finds themselves better able to do more in their communities to close the gap, and improve our first Australians quality of life…  In Australia in 2014 no one should have to live in fear or poverty…


Tuesday, May 6, 2014

Divergent The Movie!

I'm sure you all know that I am a Divergent fan, so I was understandably concerned about the adaption of the story... I'm not going to spoil any of it, what I will say is, it was awesome! Lots of it was exactly like I imagined... They stayed as true to the story as I imagine that they could... And the casting! I was so concerned about this, but they properly nailed it! If you have read the books, you should watch and even if you haven't, I still think it's worth checking... Unlike the Hunger Games, it really tells te story as intended!


Tuesday, April 29, 2014

Maple Cinnamon Apple and Pear Baked Oatmeal...

I don't like to straight jack a recipe from a book... So I will say this, you should buy this book, it's awesome, it's whole foods, it says what the recipe falls into (grain free, gluten free, sugar free, etc), and I love it! It's called 'The Oh She Glows Cookbook' by Angela Liddon... She also has a website worth checking www.ohsheglows.com

I never make breakfast food, have always been a cup of chai tea for breakfast kind of woman... Recently I have felt more hungry, lifting more weight at gym, and am bored by breakfast foods and preferring to not eat too much wheat, this seemed almost dessertish, too good to be true! Especially while I was making it,  it smells so good! And then when it cools enough to eat, it tastes beautiful... I have found my winter breakfast staple!!!


Melbourne museum...

I can never get over the value of the museum... It's $10 per adult and kids are free, and with a crazy amount to do, there is no reason not to spend a rainy day looking around, with or without kids!

The dinosaurs are a massive hit... Market was creeped out by the stuffed animals this time, but we used to spend aaaages at that exhibit! Creepy sea creatures, crystals, most importantly, the kids section... That's probably worth the money in itself! The outdoor part of the kids section... The indoor/outdoor rainforest we didn't even get to this time because we only had 1.5 hours... The first people exhibit was my highlight, but was serious in the lighting, noise, darkness, the kids were not feeling it at all! I would quite like to get back there without them to have a proper good look at it...

If you are in or visiting Melbourne, this is definitely worth checking out... Again and again!


Thursday, April 17, 2014

Salted caramel snickerdoodles... Mmmm...

I needed to bake some non allergy specific goodies for this weekend, I have friends and family helping on all fronts this Easter weekend so that I can participate in one of my best friends weddings on Saturday...

I didn't read the recipe properly before baking, or I probably wouldn't have ever got around to doing it! There is a half hour dough freezing, and then wrapping each cookie around a piece of caramel... If you have the time, it is absolutely worth it!

Check out the blog I got it from, they have amazing recipes!

http://www.twopeasandtheirpod.com/brown-butter-salted-caramel-snickerdoodles/


Brown Butter Salted Caramel Cookies

Yield: 2 dozen cookies

Prep Time: 10 minutes

Cook Time: 8-10 minutes

Brown butter snickerdoodles with a caramel surprise inside!

ingredients:

2 1/2 cups all-purpose Gold Medal flour
1 teaspoon baking soda
2 teaspoons cream of tartar
1/2 teaspoon ground cinnamon
1/2 teaspoon sea salt
1 cup unsalted butter, sliced
1 1/4 cup dark brown sugar
1/2 cup granulated sugar
1 large egg
1 egg yolk
1 tablespoon vanilla extract
1 tablespoon plain Greek yogurt
1 cup caramel squares, cut into 1/4's

For Rolling the Cookies:
1/4 cup granulated sugar
2 teaspoons ground cinnamon

Sea salt, for sprinkling on top of cookies

directions:

1. In a medium bowl, Whisk together the flour, baking soda, cream of tartar, cinnamon, and salt. Set aside.

2. To brown the butter, heat a thick-bottomed skillet on medium heat. Add the sliced butter, whisking frequently. Continue to cook the butter until melted. The butter will start to foam and browned specks will begin to form at the bottom of the pan. The butter should have a nutty aroma. Watch the butter carefully because it can go from brown to burnt quickly. Remove butter from the heat and let cool to room temperature.

3. In the bowl of a stand mixer, combine the brown butter and sugars. Mix until blended and smooth. Beat in the egg, yolk, vanilla, and yogurt and mix until combined. Slowly add in the dry ingredients and mix until just combined.

4. Form the dough in a ball and cover with plastic wrap. Chill in the refrigerator for at least 30 minutes. You can chill the dough overnight.

5. When ready to bake, preheat the oven to 350 degrees F. Measure about 2 tablespoons of dough and roll into balls. Flatten the ball with the palm of your hand and place a piece of caramel in the center of the dough. Wrap the cookie dough around the caramel, making sure the caramel is completely covered with dough.

6. In a small bowl, combine the cinnamon and sugar. Roll the balls in the cinnamon-sugar mixture. Place dough balls on a large baking sheet that has been lined with a Silpat baking mat or parchment paper. Make sure the cookies are about 2 inches apart. Sprinkle the cookie tops with sea salt.

7. Bake the cookies 8-10 minutes or until the edges of the cookies begin to turn golden brown. The centers will still be soft. Cool the cookies on the baking sheet for 2-3 minutes, or until set. Transfer cookies to a wire cooling rack and cool completely.

Recipe adapted from Ambitious Kitchen


Thursday, April 10, 2014

Gluten free, vegan peppermint chocolate cookies

Gluten free, vegan peppermint chocolate  cookies

I originally saw a gluten free recipe for mint chocolate cookies, but really wanted to make them for Mark, so I overhauled the recipe to suit my needs... The original recipe can be found on glutenfreeonashoestring.com

These are actually quite good, could do with no sugar I think... Next time...


Ingredients
  • COOKIES
  • 5 tablespoons coconut oil
  • 100g vegan chocolate, chopped
  • ¼ teaspoon pure vanilla extract
  • ½ teaspoon pure peppermint extract
  • ¾ cup (105g) high-quality all-purpose gluten-free flour
  • ¼ teaspoon xanthan gum (omit if your blend already contains it)
  • ½ cup (40g) unsweetened natural cocoa powder
  • ¼ teaspoon baking soda
  • ½ teaspoon salt
  • ½ cup (100g) sugar (take or leave)
  • GLAZE
  • 200g vegan chocolate, chopped
  • pure peppermint extract, to taste

Instructions
  1. Preheat your oven to 170 degrees. Line tins with baking paper, and set them aside.
  2. In a medium-size microwave-safe bowl, place the coconut oil  and all of the chocolate except for 3 to 4 1½-inch-size chunks. Microwave 30 seconds at a time, stirring in between, until melted and smooth. Add the reserved chunks of chocolate, and stir until the chocolate has begun to thicken a bit and the chunks have melted. Add the vanilla extract and peppermint extract, and stir to combine. Set the chocolate aside.
  3. In a large bowl, place the flour, xanthan gum, cocoa powder, baking soda, salt and sugar, and whisk to combine well. Add the chocolate mixture, and mix until the dough comes together and is well-integrated. 
  4. Put teaspoon sized blobs on the baking powder, tablespoon if you want a bigger cookie
  5. Place the baking sheet in the center of the preheated oven and bake, rotating once, for 7 - 10 minutes. Remove from the oven, and allow the cookies to cool completely on the baking sheet.
  6. Once the cookies are cool, make the glaze. Place all of the dark chocolate except for 3 to 4 1½-inch-size chunks in a medium-size, microwave-safe bowl. Microwave 30 seconds at a time, stirring in between, until melted and smooth. Add the reserved chunks of chocolate and the peppermint extract, and stir until the chocolate has begun to thicken a bit and the chunks have melted.
  7. Place the cookies, one at a time, in the glaze. Carefully place it on a clean sheet of baking paper. Allow the chocolate to set at room temperature (chocolate was setting fast so I basically iced the cookies)

Tuesday, April 1, 2014

Raw vegan snickers bars...

My girl is on a raw vegan tip, she made these amazing bars and I absolutely needed them to help my clean eating!  

There was lots of leftover chocolate so I put then in dinosaur moulds for the kids...

Recipe from
http://www.thisrawsomeveganlife.com/2012/12/raw-snickers-candy-bars.html?m=1


raw snicker bars: makes about 10 bars

Nougat layer:
1/2 cup raw flour (such as oat, coconut, buckwheat, almond, etc.)
1/3 cup raw agave/maple syrup
1 cup sliced almonds
1/4 pine nuts (optional) 

Caramel layer:
1 cup dates and enough water to cover them
1/4 teaspoon salt (optional) 
1/2 teaspoon vanilla
2 tablespoons melted coconut oil

Raw chocolate coating:
Just use your fave recipe or my own 

To make the nougat: pulse the flour, pine nuts (if using) and sweetener together in your food processor until smooth. Add the almonds by hand. Shape into small logs on parchment paper and put in the freezer. 

To make the caramel: blend all ingredients together in your blender until creamy and thick, adding the least amount of water you can. spread a little on to the tops of each nougat log and put back in the freezer. 

When they are frozen enough, cover each one in chocolate and let harden in the freezer or fridge.

Sunday, March 30, 2014

The Lego Movie

We had all sorts of plans for today, and on Friday, when they all fell through, I immediately remembered the Village Cinena email that offered $10 tickets to an advanced screening to see the Lego Movie... They pushed back the release of this film in Australia to coincide with school holidays, despite it being out for up to a month in other countries... We ordered tickets and away we went!

At Village cinema, there were a few Lego related activities for the kids, had this been better publicised we would have arrived earlier... In any case, we were given plenty of take away colouring in sheets etc... They also have a Lego family combo, which includes 4 small popcorn and 4 small drinks AND 4 sealed packets of Lego for $35... With a Robot police man and his little ship, and the Piece of Resistance pack with Emmet and a wreckage scene where he found the piece of resistance, they are already selling on eBay between $10-20!

The film itself was awesome! I don't like posting spoilers, what I will say is this: I didn't look at my watch, which is the best possible sign... It had something for everyone, we all found very different things funny and ALL laughed loudly throughout... We are 36, 34, 5 and 3... We will definitely be buying it once it is out, Marley asked if we could the minute the credits rolled!


Saturday, March 29, 2014

Salted Caramel Banana Pudding...

I saw this and had to make it... The problem with puddings and cakes, large items that don't keep, I feel like they will go off before we get to eat it... My BFF was having a dinner party and I offered to bring dessert...

It was delicious and rich, not exactly as thick and solid as I had have hoped... I would definitely consider making it again, but all on the day before, I didn't think 8 hours was enough for the last refrigeration... And after eating it for breakfast this morning, while it didn't look great, my pic is pretty bad, it tasted even better! I used Marie biscuits as they don't sell the nilla biscuits in Australia...

Recipe from Magnolia NYC taken from 
http://www.ringfingertanline.com/2014/01/12/magnolia-bakerys-banana-pudding-salted-caramel/

Magnolia Bakery's Banana Pudding With Salted Caramel
Ingredients
    For the pudding
    1. 1 (14-ounce) can sweetened condensed milk
    2. 1½ cups cold water
    3. 1 (3.4-ounce) package instant vanilla pudding mix
    4. 3 cups heavy cream
    5. 1 (12-ounce) box Nabisco Nilla Wafers
    6. 4 cups sliced ripe bananas
    For the caramel
    1. 1 1/2 cups sugar
    2. 1/3 cup water
    3. 1 1/4 cups heavy cream
    4. 3 tsp fleur de sel
    Directions
      For the pudding
      1. In the bowl of a mixer, beat sweetened condensed milk and water for about a minute. Add the pudding mix and beat for about two more minutes.
      2. Transfer to a smaller bowl, cover, and refrigerate for at least 4 hours or overnight.
      3. In a large bowl on medium speed, whip the heavy cream until stiff peaks form. Using a rubber spatula, gently fold in the pudding mixture until combined.
      4. In a large bowl, layer wafers, bananas, and pudding. Cover tightly with plastic wrap and refrigerate for about 8 hours before serving.
      For the caramel
      1. Combine the sugar and 1/3 cup water in a medium heavy-bottomed saucepan. This is the only time you can stir the sugar. If you stir it while it's cooking, it turns to rock candy. Place the saucepan over medium to low heat until the sugars start to dissolve, 5 to 10 minutes. Then turn the heat up to medium-high and cook until the sugar starts to caramelize, 5 to 7 minutes. Do not stir while this is happening. You've got to watch the pot, because it goes from caramel to burnt really quickly. And be careful, the mixture is extremely hot!
      2. Turn off the heat and stand back to avoid splattering. Slowly add the cream. Don't panic - the cream will bubble violently, and the caramel will solidify. Just give it more time to liquefy again-trust me!
      3. Simmer over low heat, stirring constantly, until the caramel dissolves and the sauce is smooth, about 2 minutes. Allow the sauce to cool to room temperature, at least 4 hours. It will thicken as it sits. Stir in salt. Recipe will make more caramel than needed for the pudding, but I'm sure you can find something to do with the leftovers!
      Notes
      1. PLAN AHEAD when you're going to make this! Make the caramel and first part of the pudding recipe at the same time, wait 4 hrs, finish the pudding, and refrigerate overnight. The caramel does not need to be refrigerated - it thickens at room temperature.
      2. This caramel recipe will make much more than you need for the pudding... but you will not be upset about it. Trust me, you'll find use for it.

      Friday, March 28, 2014

      Sons of Anarchy: Night of mayhem at The Palace Melbourne

      I love panels and I love Sons of Anarchy, it was a no brainier that I attend this... 

      Dropped the $60 on a ticket to see Tig (Kim Coates), Juice (Theo Rossi) and Bobby Elvis (Mark Boone Jnr) talk about their experience working as actors on the show... I was concerned about it being at The Palace, having only ever seen panels in convention settings... I was right to be concerned... During the day, I rang The Palace to find out the running times, they said it should start around 8... We arrived at 7, to a massive queue as doors opened at 7.30, at 8 I called The Palace again, they said it would start at 8.30... Standing around waiting for an hour didn't impress me, especially with a random old biker film and bad music on, then a miserable dude performed... At 9.30 they came on... I stood still waiting for two hours waiting for a one hour panel... The host didn't know what he was doing... No charisma, no sense of how to lead the men into stories...

      Boone sang a song, we watched a reel, they did the Q and A portion of the evening which after 2 hours of drinking were just repetitive, boring and outright embarrassing... It was awesome when they told a story or two, giving us a sense of themselves, their work etc... But overall it was too long and uncomfortable, and ultimately I left feeling pissed off and angry...

      It was poorly organised and executed... Bad job on the organisers...

      Tuesday, March 25, 2014

      Unbearable Lightness - Portia DeRossi

      I wanted to read this book when it came out, but life got in the way... A couple of weeks ago, Amazon said it was on sale, so I downloaded it onto my kindle... And waited... I have to pick when I start a book, because if it is a good book, I won't get anything done until it is done...

      I started it Sunday night, and finished it this morning... It was good.. Not in a feel good way, in fact I found most of it, maybe the first 90% terribly upsetting, but I had to know what happened, what changed for her to make her a happy human... I have read a lot about eating disorders and coming out, but the two combined in such detail, it was raw... I had bad dreams about it last night... And I am so happy that her life has brought her love and happiness...

      This isn't your usual celebrity biography, this is a focused journey from the depths of anorexia and bulimia, to love and light... If you know anyone suffering an eating disorder, read it! I would honesty say to read it anyway... 

      Monday, March 24, 2014

      Townhouse Toorak Village...

      After 2 new babies, I finally got out for brunch with 3 of my favourite humans... We chose Townhouse because it was central to our needs, and got a good urbanspoon rating... 
      Unfortunately they don't take bookings, and there weren't tables inside, I didn't take a jacket, so I was freezing! An outside heater wouldn't go astray, coming into the winter months! It looked great, a welcoming set up and vibe... The menu was fresh and seasonal, there were way too many things that looked good, and no eggs Benedict so I was forced out of my brunch comfort zone... 

      I ordered the breakfast bun, and between the four of us we had 4 different meals, and ALL were good! It all looked good, and tasted good... The service was great,  table situation aside (we did ask to be moved inside if  a table became available, several did, we weren't moved), I would definitely go back!

      Everyone started to eat before I could get photos! But her are mine and Kelly's after she popped her egg!

    1. Townhouse
    2. 466 Toorak Rd, Toorak VIC 3142


    3. Saturday, March 22, 2014

      Coconut oil...

      I'm in...

      I finally made the pricey purchase of coconut oil recently... I have used it in my cooking, which was the main point, and then I received an email from Passion Foods which was a game changer... 

      Yesterday I was suffering with really dry lips after my cold, and I have been using it on my lips and they are almost cured! Including an almost cut from the dryness! Tonight I took my makeup off with it, am crossing my fingers that my sensitive skin  doesn't freak about that tomorrow, will edit it in if it does... I'm considering trying it as a moisturiser if it goes well, it would significantly reduce my beauty costs if it could be used as a cleanser AND a moisturiser!

      https://passionfoods.myfoodlink.com
      COCONUT OIL, and just what makes it so amazing!
      Of course using it as food is obvious. Besides having antiviral, antibacterial, and anti-inflammatory properties,1 coconut oil is an excellent source of medium-chain fatty acids (MCFA). Unlike long-chain fatty acids (LCFA) found in meat and vegetable oils, MCFA are quickly broken down by the body and used as an energy source, meaning that the simple act of replacing LCFA with MCFA can produce weight loss with no changes in caloric intake.2
      Use coconut oil for desserts, cooking, or as a butter replacement. Add it to smoothies, cereals, and homemade granola.
      Our coconut oil is truly raw, unrefined, extra-virgin, organic, and non-GMO. Minimally processed with no added ingredients, it has the perfect balance of delicious flavour without any excessive aromas or taste overtones.And now for the unexpected – 30 ways to use Coconut Oil beyond food!  
      Beauty & Personal Care
      Moisturize: Apply coconut oil topically on your body and face to keep skin supple. Use a thin layer around the eyes to smooth out wrinkles and reduce sagging skin.
      Exfoliate: Mix half coconut oil and half coconut palm sugar in a bowl or jar and scrub dry skin before a shower.
       Remove Makeup: Ditch that store bought makeup remover for pure coconut oil. Moisten a cotton ball and add a dab of oil to remove your makeup. Then use a damp washcloth to remove any excess.
       Cleanse Your Face: Apply coconut oil onto your face and neck, remove with a damp washcloth and pat dry.
      Make Your Own Facial Scrub:Mix ½ cup coconut oil with 2 Tbsp coconut palm sugar. Stir until you get a gritty, spreadable consistency. Then squeeze 1 Tbsp fresh lemon juice and mix. Store in a glass jar for 2-3 weeks.
       Shave: Use a thin layer of coconut oil and shave as usual. This is excellent for sensitive skin. The antibacterial potential of coconut oil1 will also help soothe small cuts from your razor. You can even use a small amount as an aftershave lotion.
       Take a Coconut Bath: Add coconut oil to a hot bath to soothe dry, itchy skin, plus it smells wonderful. Be sure to scrub the tub after to prevent slipping.
       Coconut Nail Care: Apply a small dab of coconut oil on your cuticles to moisturize dry areas.
       Pregnant or New Mom? Try massaging coconut oil onto breasts and belly to help prevent stretch marks. It is gentle enough to use on baby’s skin to soothe diaper rash, and for use as perianal massage before and after birth.
       Massage: Since we’re on the topic, give a loved one a massage with coconut oil.
       Deodorize: A small amount of coconut oil applied directly onto your armpits can help keep odours away, again thanks to its antibacterial properties. 1
       Lip Balm: Simply apply coconut oil to your lips, or try combining with  for extra shea butter creaminess.
       Oral Health: Try mixing coconut oil with baking soda and a tiny amount of hydrogen peroxide as a toothpaste. You can also try the Ayurvedic remedy of oil pulling (swishing) with coconut oil for up to 20 minutes—this has been proven effective at reducing bacterial count in the mouth.3
       Insect Repellent: Apply coconut oil to help keep insects from biting. One of our staff members says this worked even in the mosquito-laden jungles of Costa Rica!
       Hair Care: Massage coconut oil onto dry hair an hour before your shower, or even overnight with your head covered to protect your pillow. You can also use it to tame any frizz or fly-always before you leave the house
      Stress Relief: Massage coconut oil to your head in a circular motion and breathe in the sweet, nutty aroma to relieve stress.
       Clean Your Ears: A tiny dab of coconut oil at the end of a Q-tip can help gently remove wax.
       For Fido Too: Apply coconut oil to your pet’s coat if they are experiencing skin issues.
       
       
      Household Uses
      Clean Wooden Furniture: Use coconut oil to clean and condition wooden surfaces. Be sure to test a small area first. You can even use it on your wooden cutting boards when they start to look dry.
       Metal Polish: Use coconut oil to make metals shine. Again, be sure to test a small area first.
       Detail Your Car: Apply a small amount of coconut oil to a soft cloth and clean your car interior. Be sure to wipe off any excess with a clean cloth.
       Season Cast Iron: Use coconut oil to season cast iron pots and pans.
       The Squeaky Wheel Gets the…Coconut Oil: Ditch the WD40 and use coconut oil on squeaky hinges and bicycle chains.
       Zippers, Too: Coconut oil can help unstick stubborn zippers.
       Get Artistic: Coconut oil is great to lubricate your guitar strings. Also use to clean your paintbrushes, as well as your hands after using oil based paints.
       
      Soap Scum Be Gone: Apply a small amount of coconut oil to a wet cloth and scrub that tub. Then spray with hydrogen peroxide and wipe dry with a clean cloth.
       Shoe Polish: Use coconut oil to shine your shoes.
       Residue Magic: Coconut oil is excellent for removing chewing gum from any surface, including carpets and hair. You can also use it to remove residues from labels if you like to reuse your glass jars.
       Clean Your Mouthguard: – A little coconut oil can help sanitize your mouthguard or retainer. Rub it on in the morning, let it sit throughout the day, and then rinse in the evening.
       Even Plants Love It: Coconut oil will give a glossy finish to indoor plants when you use a small amount on a soft cloth and wipe the leaves.
       
      All of this in one jar of coconut oil! How many household and beauty products can you replace with this one superfood?

      Passion Foods is located at:

      219 Ferrars St, South Melbourne
      Tel: 03 9690 9339
      Fax: 03 9682 7747